Monday, January 28, 2013

Studio Calico February designs...

Popping in to say hello and share my Studio Calico projects for this month! How are you? I miss blogging ... I haven't been the best blogger lately. Truth is: I haven't really been crafting! We are getting ready to put our house up for sale and move to another state for my husband's job (Colorado), so we've been busy finishing up little house projects and cleaning/purging. I am excited for the big move, but it's definitely scary to uproot. If you have any moving tips, please do share with me! :)

Anyway, the first five cards from the Studio Calico kits were made with the MAIN CARD KIT only! Here is the link to purchase the main card kit products that I used here today.
This one was made with the cute little 6x6" paper pad. Studio Calico always has beautiful papers and colors (and they are exclusive, not found anywhere else, one thing I love about these kits)! I angled some strips of papers and tucked in the little labels. I used the Hello stamp in the kit on the bigger label. I just love these enamel dots!!
This one shows the fun telephone dial stamp. I stamped it onto the vellum in the kit and embossed with white Zing. Then it's layered over one of the patterned papers. The frame is cut with Fabulous Frames die by Papertrey Ink.

I added a few of the colorful enamel dots to the dial for a fun look. The frame is popped up for a bit of dimension.
Here I am playing with my reinkers again. I stamped and embossed the Hello all over the white cardstock and then painted over the top with a bit of ink and water. Use more water on your paintbrush than ink. You can always add more color if it's not dark enough for you. If you go heavy on the ink and light on the water, you'll get very dark streaks. You want it to blend a bit...

I used Aqua Mist, Spring Moss and Harvest Gold die ink refills by Papertrey Ink to paint with. (Mainly I chose these colors because I thought they matched the rest of the card kit nicely!)

Here I wanted to use the fun "let's stay connected" stamp...

I tucked a little stamped label under the patterned paper.

On this one, I used Studio Calico's Opaque White Mist on the kraft cardstock first and let dry. I cut the papers from the Fabulous Frames dies again and stamped into the center.

The flower was made by punching about five pieces from the vellum in the kit. I used Martha Stewart's Double Craft Embroidery punch, then stacked all of the flowers up in the center and stitched them so they would stay together. I scrunched up the flower with my fingers to add dimension and pulled the little flowers apart a bit while scrunching each layer. A little enamel dot finishes out the center and adds color!

Last, I wanted to play around with the vellum again. I guess you could say I'm a little addicted to working with it these days! So many fun things you can do with it, and I like how the papers and embellishments can peek through. Here I stamped the vellum and then layered it over some of the journaling cards.

That's it for me today. Thank you for swinging by and saying hi!


Wednesday, January 23, 2013

Feb card kit sneaks...

I have a few sneakies to share with you made solely from the Studio Calico main card kit for February! Loving the patterns in the 6x6 paper pad!!
Also really digging that hello stamp...great font!


This cute phone stamp is in the main card kit... ;) and more of these pretty patterns.

One more...made a little vellum flower with the vellum piece of paper in the kit.

This card kit and the other Studio Calico kits will be up for grabs in just a few short days! See you then with the full reveal. Am trying to stick mostly with the main kit this time, just to give you an idea of some fun things you can do with solely the main card kit. ;)


Tuesday, January 22, 2013

Lily Bee designs...

Hi there, just wanted to pop in and share a few things that I've made with Lily Bee's new lines: Sweet Shoppe and Pinwheel! The first layout is made with Sweet Shoppe. This line is my favorite out of the two with it's fun patterns. I wanted to show all of the pretty patterns, so I used strips behind a little title that I cut out with my Silhouette Cameo machine.
I dangled a little photo of Kati when she was little. The journaling tells about how she was such a good baby and still is that same girl - very easy to take care of. Such a great kid!
A little pic of the butterfly and stitching detail...

This card is made with the Pinwheel line (papers) and the berries and saying are Sweet Shoppe. The frames are cut with Mat Stack 6 dies by Papertrey Ink.

Loved all of the patterns in the little banner, so I had to add it across the card!


Here is Sweet Shoppe again with lots of the tab stickers...


Another Sweet Shoppe card. I used a doily and some banner stickers.


A few quick tags...These are cut with Papertrey Ink's Wine Bottle Tag Die.
The tags below are made with the Pinwheel line. I used Papertrey Ink's die called Card Base-ics #2 and Turning a New Leaf die for the stems.


The colors in the Pinwheel line are much softer, but so pretty! I made a few more things, but my photos didn't turn out that well, as I was in a hurry to rush them to FedEx that day to have them wisked off to CHA. Ug! Thank you for stopping in and visiting me today! xo I'll be back with some Studio Calico sneaks soon.


Friday, January 18, 2013

secret crush...

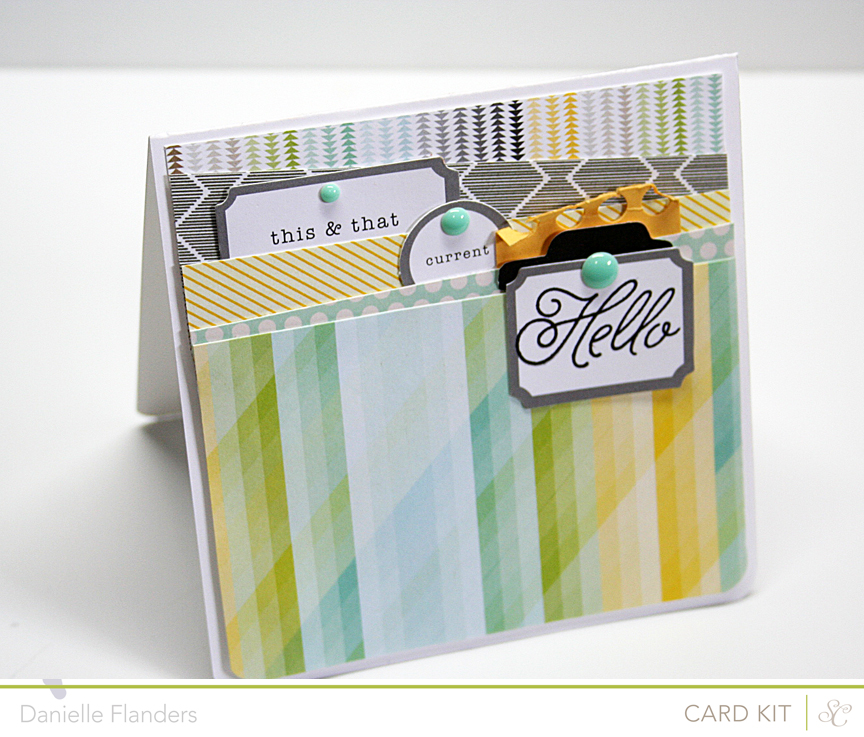
Have you been over to visit the Pink Paislee blog lately? We have a new clean and updated look to our site and would love for you to come check it out. A couple of days ago, I had a post up on the blog - stop over to read more about my mini album and to see many more projects made with the new Secret Crush line! The new team is rocking it out! :)

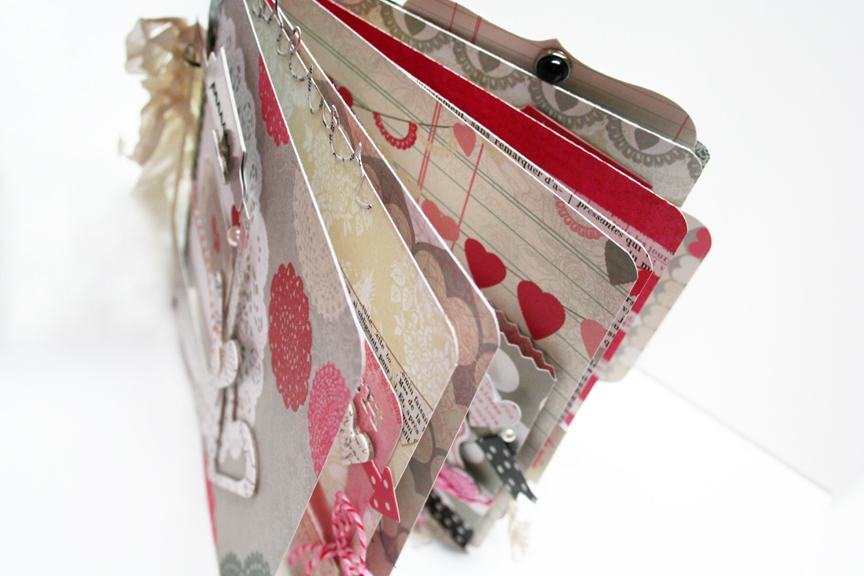
I made this entire little mini album base with just two pieces of 12 x 12" paper. Let me show you how...

To create the album base, I cut the two pieces of patterned paper in half, so I ended up with 4 pieces of 6 x 12" papers. Then I folded these in half again and placed them on top of one another, stacked to make the mini book. This gives me 8 pages (16 if you count front and back)! The album is 6x6" finished size.
On the front cover, I decorated it with a piece of washi tape, a Photo Frame from the Secret Crush line, some of the Paper Goods ephemera, a Photo Tab, and some of the chipboard hearts from the Artisan line.

The chipboard hearts are swiped with a gray stamping ink, just to bring out the embossed chevron design already on them. The darker the color you use, the more the chevrons will pop out! I wanted a soft look here on my hearts, so I used my finger to apply the ink, just a little at a time, so I could add more if I wanted it darker.


Now for some of the inside pages...

On this page, I die cut a word with Papertrey Ink's Wonderful Words dies and placed it at the top of the page, sort of as a tab so it peeks out the top when the book is closed. Added a Secret Crush Photogram frame with lots of ephemera, twine tape and more hearts.


Next, I made a vellum pocket to hold a cute die cut and added some stickers, tape and vellum punched pieces on the front. The vellum was punched with a Martha Stewart doily punch.


On the xoxo page, I made another vellum pocket to fit behind the frame.

Filled it with arrows for now, but a photo inside would be adorable, as would journaling!

Another little pocket page...

Made my own little flag here with washi tape and a stick pin.

Here I used a Photo Frame as a tab hanging off the side of the page (and you can see one in the back upside down hanging off the top of the page!)...

More layered goodies...

This is a Photogram with patterned paper behind it, hung with tape and twine...

And one more pic of the whole shebang...

Hope you enjoyed this little book! Let me know if you have any questions regarding products or how I made something. :) The patterns in Secret Crush are so much fun and make it very easy to create with. Have a wonderful day,


Tuesday, January 15, 2013

release day...

Welcome to "release day", the day we get to share more fun new products coming out this month at Papertrey Ink. They'll be available tonight the 15th at 10 pm EST at Papertreyink.com. 
This first card is made with a new stamp set called Square Prints and the new Think Big Favorites #24. I stamped and die cut the squares and laid them out in a fun, colorful random fashion for a birthday card. The sentiment is stamped and embossed on vellum, and I added a Heart Border Die with Raspberry Fizz paper.
Happy Birthday card:
STAMPS: Square Prints
INK:
PAPER:
Fresh Snow, Summer Sunrise, Raspberry Fizz, Pure Poppy, Harvest Gold, Hawaiian Shores cardstock, Pink Paislee patterned paper - Secret Crush
DIES: Square Prints dies, Heart Border die
OTHER: white embossing powder

-----------

Next up, I used the new Heart-2-Heart #12 stamps combined with an older set called Postmarks
I discovered that the little circular sayings from Postmarks fit right over the top of the circles in Heart-2-Heart #12, so I did a bit of layering with the two stamp sets! I stamped the "Carte Postal" in Soft Stone ink first around the card, then then added the "thinking of you" and "just a note" and last filled in with the fun Heart-2-Heart #12 circles!


Just a Note card:
STAMPS: Heart-2-Heart #12, Postmarks
INK: Soft Stone, Harvest Gold, Raspberry Fizz, Limeade Ice, True Black, Smokey Shadow
PAPER: white, Aqua Mist
DIES: none
OTHER: twine.

-----------

The Sweet Little Baby saying on this card is from a new stamp set called Everyday Photo Finishers. I used the Photo Finish Strips dies to cut the horizontal strip, then stamped the baby saying in Sweet Blush ink onto Sweet Blush cardstock and layered it over the strip.

I thought the Background Basics: Gingham stamps would work great with a baby card, so I made a little banner to add behind the frame with the gingham pattern.


Sweet Little Baby card:
STAMPS: Everyday Photo Finishers, Background Basics: Gingham
INK: Sweet Blush, Hawaiian Shores
PAPER: Classic Kraft, Sweet Blush

DIES: Photo Finish Strips
OTHER: Tattered Angels chip frame, Pink Paislee chip hearts, patterned paper and artisan flower.

-----------

Here I used the Heart-2-Heart #12 stem and stamped it several times to create a "frame" sort of feel. Then I punched some red paper for the little berries. The sentiment in the center is from Happy For You.


Couldn't Be Happier For You:
STAMPS: Happy For You, Heart-2-Heart #12
INK: Fresh Snow, Classic Kraft, Limeade Ice, Pure Poppy, Dark Chocolate
PAPER: Classic Kraft, Dark Chocolate
DIES: Heart-2-Heart #12
OTHER: corner rounder, dimensional adhesive.

-----------

This one is made with both World Map and Destination. I didn't have a big enough stamping block for the whole World Map stamp, so I stamped a portion of it onto vellum, embossed and cut it out, added Aqua Mist cardstock behind it. From Destination, I stamped the saying on Fine Linen cardstock, the map onto Aqua Mist with Ripe Avocado and the ticket with True Black onto Classic Kraft cardstock. I punched little notches in the ends of the ticket.
Destination card:
STAMPS: Destination, World Map
INK: Fresh Snow, True Black
PAPER: Classic Kraft, Fine Linen, Aqua Mist, vellum
DIES: none
OTHER: brad, twine, white embossing powder, hole punch.
-----------

Here I used the numbers from Number Time Trio, along with Party Poppers stamps and dies and the big flower/center from Rosie Posie stamps.


Celebrate 12 card:
STAMPS: Number Time Trio, Party Poppers, Rosie Posie
INK: Fresh Snow, True Black, Raspberry Fizz, Aqua Mist, Summer Sunrise
PAPER: white, Summer Sunrise Pattern Pack, Hibiscus Burst, gray cardstock from my stash
DIES: Party Poppers
OTHER: pearls, twine.
-----------

Stop by the rest of the team members' blogs and leave them some love! :) 
Nichole Heady