Tuesday, February 23, 2016

Creative Cardmaker: Do the Splits...

In my Creative Cardmaker post over at Scrapbook Expo today, I'm talking about splitting your card fronts! I have been noticing this as a trend quite a bit lately...it's not really a new technique, but I really wanted to give it a try! It's a great little spot to house a sentiment and really draws your eye to it!

The card front is actually just cut with a paper trimmer, but Papertrey Ink has these really cute Sentiment Splits dies that are shaped with curves and fun shapes that will cut a little spot for your sentiment also!

The Peonies on Parade were stamped and embossed with white embossing powder, then colored in with Papertrey Ink ink pads: Lovely Lady, Raspberry Fizz, New Leaf and Ripe Avocado inks. I stamped the ink pads onto an acrylic block, then painted them onto my flowers with a tiny bit of water. I used the Big Hugs stamps and dies for the sentiment and Soft Stone cardstock in the background.

Please stop over to Scrapbook Expo's Weekly Scrapper blog to read more!

Wednesday, February 17, 2016

More stenciled cards...

Today I chose to just sit and play. I haven't done this in ages...just creating for fun, not for work, while listening to audios on things I've been wanting to learn about myself. Feels so good to take time for me and just let out my creativity. Does that make sense?

The Modern Stencils Collection by Papertrey Ink was used for the backgrounds with the same technique I shared in my post over at Scrapbook Expo. The stamps I've used are Bitty Bouquets and Big Birthday Wishes.

On this one, I used Aqua Mist ink in the background with Tropical Teal ink on the "Enjoy". The stencil looks great in a lighter color than your focal point, but in the same color family.

What are you doing today? I hope you have an opportunity to take time for you and get into your happy place! xo We all need that so much, and that's what cardmaking does for me.
Danielle

Tuesday, February 16, 2016

Stenciled backgrounds...

Recently I've started dabbling in ink blending on my cards! It's such a fun way to add color. You can ink blend directly onto the card or over a stencil like I did here today.  *Note: this card is inspired by Betsy's Sending Love card from her post on the 14th.
Over at the Scrapbook Expo blog, I show a few step-by-step photos with the supplies I used and talk about why I love this technique!
 I've used the Modern Stencil collection, the Bitty Bouquets stamps and dies and the Big Birthday Wishes stamps.

Swing by the Weekly Scrapper blog over at Scrapbook Expo to read more!

Monday, February 15, 2016

Release day...

Well, today is the day when all of the new products for February will be released at Papertrey Ink! Everything we have been previewing the past 10 days will be available tonight at 10pm EST. Have you seen anything you want to try this week? I have a few more new projects to share with you. Here we go!

First up is the new Spring Woods stamp set and dies (bird and branches) and the new Cover Plate: Pretty Frame. Part of the frame is popped up to add a bit of dimension, and the background is ink blended with Lovely Lady ink to create a soft background for the die cuts. I love how the frame gives the card a beautiful edge! I think I'll be using this one a lot!
Had to try ink blending again in the background with Lovely Lady ink and then the sentiment is stamped with Friendship Jar Spring Fillers stamps.

Next, we have the new Just a Note stamps and die. I also used the Cover Plate: Scroll Frame.

The center of the frame is popped out, and I used vellum to stamp the Just a Note frame and sentiment, Painted Petals leaves and a flower from Bitty Bouquets.

Here is the new What the Doodle: Butterfly stamps and dies. I used the inside of the frame from the new Cover Plate: Scroll Frame and ink blended with Aqua Mist ink on the inside. The butterfly was cut out, then stamped and embossed in white. Then I used a Summer Sunrise ink pad and rubbed it over the butterfly. I colored in a few of the flowers on the butterfly with a R39 Copic marker.

The leaves are die cut from Painted Petals.

Last, but not least, is the new Be stamp set and dies (flowers and stems) and the new Keep It Simple: St. Patrick's Day stamps.

The stems were stamped in Mint Julip and New Leaf inks. The frame is again from the Cover Plate: Pretty Frame like the first card above. I just used the inside panels.

Hope you enjoyed these ideas. Please visit the rest of the team to see more with all of these fun, beautiful new products! 

Sunday, February 14, 2016

2016 Anniversary Set: Painted Petals...

Papertrey Ink is excited to offer this year's gorgeous new anniversary set! Receive the limited edition Painted Petals stamp set with the redemption of 24 Customer Rewards Points before February 15th, 2017 9:59pm EST. This is a limited edition set and will only be available for twelve months. If you have any questions about Customer Rewards and how you can start earning them today, check out the website HERE.


Here are two cards made with Painted Petals. On the first one, I tried my hand at ink blending. I was very surprised at how well it went! For some reason, I thought it would be a lot more difficult. I'll have to try it again soon. Isn't trying new things fun? That's one of my favorite parts of creativity!

The background frame paper is from the Black & White All Over paper pad. I used Aqua Mist and a Tim Holtz ink blending tool, dipped it in an Aqua Mist ink pad and rubbed gently over the paper to get the soft aqua in the background. The flowers are die cut and stamped with Painted Petals, along with the sentiment as well.

The second card also uses a paper from the Black & White All Over paper pad. I trimmed the paper down slightly to create a smaller piece for the front and backed it with Hawaiian Shores cardstock.

The flower is die cut and stamped with Painted Petals. I stamped the sentiment in Aqua Mist and Tropical Teal inks.

Hope you enjoyed these ideas. Please visit the rest of the team to see more with Painted Petals! 

Friday, February 12, 2016

Make It Market Mini Kit: Color Pop Florals...

Welcome to day 8 of Papertrey Ink's anniversary festivities! Today we have a new mini kit to show you that will be released on Feb. 15th at 10pm EST called Color Pop Florals by Betsy Veldman. It's gorgeous!

On the first card, I used the background paper from the mini kit (gray linen). The pre-printed papers have white spaces where you place the flowers, so if you need a tiny bit of help figuring out where to place everything, it gives you a design to go by!

You have four different options with these pre-printed papers:
1. You can stamp the flowers directly onto the paper,
2. You can die cut your own flowers and leaves to add over the top with the stamps and dies in the kit,
3. You can die cut the preprinted flowers from the papers in the mini kit, or
4. You can use the stencils in the mini kit over the blank flowers!

On this card, I chose to die cut the preprinted flowers and adhere them to my card over the white spaces -the design has already been done for me, the hard part is just choosing the colors to use for the flowers! The larger flowers are popped up with dimensional adhesive. The "Celebrate Today" is also die cut from the dies in the mini kit.

Gray Celebrate Today card: 
STAMPS: none
INK: none
PAPER: Make It Market Mini Kit: Color Pop Florals
DIES: Make It Market Mini Kit: Color Pop Florals
OTHER: sequins - Pretty Pink Posh.
-------

The second card also uses the preprinted papers, but this time I stamped the flowers and leaves directly onto the paper with the Color Pop Florals stamps. I used Sweet Blush and Raspberry Fizz inks for the flowers and for the leaves, Stormy Sea and True Black.

The "Celebrate Today" is die cut from Aqua Mist cardstock with the dies in the mini kit. Which card do you prefer? They were both so quick and easy. Love that!


Celebrate Today card:
STAMPS: Make It Market Mini Kit: Color Pop Florals
INK: Sweet Blush, Raspberry Fizz, Stormy Sea, True Black
PAPER: Make It Market Mini Kit: Color Pop Florals
DIES: Make It Market Mini Kit: Color Pop Florals
OTHER: sequins - Pretty Pink Posh.
-------

Visit the rest of the team to see more with this mini kit! These products will be available on Feb. 15th at 10pm EST at Papertrey Ink!

Thursday, February 11, 2016

New Products for Spring & Egg Hunt...

The Papertrey Ink team has a ton of new spring products to show you today, including the Bunny Basket stamps & dies, Cover Plate: Basket die, Easter Grass die, Shaped Sayings: Easter and the Simply Spring Borders stamps & dies!  Everything you see that is new here today will be available for purchase at 10pm EST at Papertrey Ink.

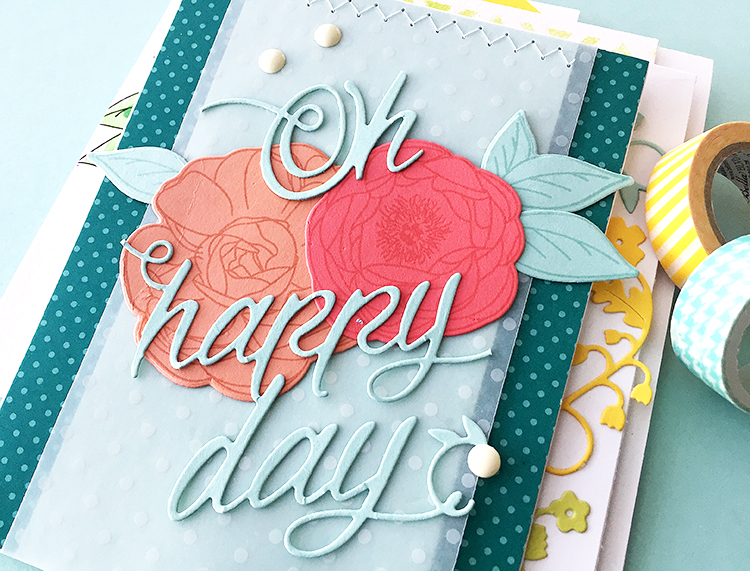
Be sure to start at Nichole Heady's blog for the annual "scavenger egg hunt" as you hop through the design team's blogs to locate all of the egg icons for your chance to win! Click on the above official egg hunt photo to see it larger.
First, I have a treat wrap made with the Cover Plate: Basket die. Basically my treat wrap is a card that I placed glassine bags inside, then wrapped the seam binding around it like a little package. The glassine bags hold candy and a note.
The basket die is cut from Aqua Mist cardstock and placed over Mint Julep cardstock. I also couldn't help but to work with the Tulip Time stamps and dies again! I don't think I did them justice yesterday, gah! I love them SO!

The tag is stamped with Tulip Time, Bunny Basket and Simply Spring Borders. The Easter grass is cut with the Easter Grass die out of vellum.

Spring is in the Air Treat Wrap:
STAMPS: Bunny Basket, Tulip Time, Simply Spring Borders
INK: Bright Buttercup, Sweet Blush, Aqua Mist, Raspberry Fizz, Simply Chartreuse, Ripe Avocado, Lovely Lady, Harvest Gold, Summer Sunrise inks
PAPER: White, Aqua Mist, Mint Julip, vellum
DIES: Cover Plate: Basket die, Easter Grass die, Tulip Time dies
OTHER: seam binding - Zipperstop, glassine bags, candy.
-------


On the next card, I began with the Bunny Basket stamps to create a colorful egg background.
The Limitless Layers 2.5" Circles scalloped die was cut to place behind the Shaped Sayings: Easter die cut, then a few enamel dots were sprinkled around to finish out the "colorful" look!

Colorful Easter card: 
STAMPS: Bunny Basket, Simply Spring Borders  
INK: True Black, Sweet Blush, Summer Sunrise, Bright Buttercup, Raspberry Fizz, Aqua Mist, Lavender Moon
PAPER: Aqua Mist, white
DIES: Shaped Sayings: Easter, Limitless Layers 2.5" Circles
OTHER: seam binding- Zipperstop, enamel dots.
-------

Visit the rest of the team to see more Spring/Easter ideas! These products will be available on Feb. 15th at 10pm EST at Papertrey Ink!

Wednesday, February 10, 2016

Introducing Tulip Time...

Good morning! Today I have a really simple card to share made with the new stamp set called Tulip Time, coming out on Feb. 15th at 10pm EST at Papertrey Ink!
The background paper is printed on linen cardstock, so it has a pretty cross-hatch texture, it's from the new Spring Woods Patterned Paper collection. I love the colors. The flowers are die cut and stamped with the new Tulip Time stamps and dies and the Easter sentiment is from the new Keep It Simple: Easter stamps.

Easter Blessings card:
STAMPS: Tulip Time, Keep It Simple: Easter
INK: Lovely Lady, Raspberry Fizz, Limeade Ice, Ripe Avocado
PAPER: Spring Woods, white cardstock
DIES: Tulip Time
OTHER: clear sequins - Pretty Pink Posh.
______

Are you enjoying all of the Papertrey Ink anniversary festivities? :) Visit Nichole Heady's blog to see more with these new products!

Tuesday, February 9, 2016

Creative Cardmaker: Stitched Banners...

Want a quick and easy way to add a focal point to your card? Create a stitched banner! If you have a sewing machine at home, you can make a stitched banner in a FLASH!


The papers I used were from an older Studio Calico card kit, but you can use any scraps you have on hand! The butterfly punch is by Martha Stewart and the stamped saying is from the Make It Market mini kit: Lovely Laurels by Papertrey Ink.

The center butterfly is punched out to create a negative look, and the front panel of the card is popped up slightly. I always like the balance of something being centered on the card, yet the randomly placed butterflies add a little bit of unexpectedness to it as well.

You can read more info about this card and the stitched banner technique over at the Weekly Scrapper blog! See you again tomorrow with another Papertrey countdown post! 

Introducing Peonies on Parade, Paper Clippings and Inspired...

Today Betsy Veldman and I are introducing some new products that will be released at Papertrey Ink on Feb. 15th, so let's get started! I can't wait to show you my four cards!

First up, I've used the new Peonies on Parade stamps and dies to create the flowers. The gorgeous sentiment die cut is from the brand new Paper Clippings: Happy Day dies! I love this die!! The font is gorgeous. I trimmed away the little flowers and just used the saying part of the die.

I've used Melon Berry and Berry Sorbet cardstocks and inks for the flowers and Aqua Mist for the leaves with Tropical Teal in the background.

Next, I used the new Peonies on Parade watercolor paper. The stripe and the yellow cardstock are a new color called Bright Buttercup! Looks so pretty with the purple watercolor paint.

The sentiment is again from the Paper Clippings: Happy Day dies.

On the third card, I stamped the "Oh Happy Day" in the center with the Paper Clippings: Happy Day stamps, then used the flowers from the die. I trimmed the flowers off the die and placed them around the saying. I actually cut 3 different colors of them to make a pretty "frame" for the sentiment.

The great thing about stamping in black is if you make a mistake and the stamp doesn't cover completely, you can take a black fine point Sharpie and touch up the words! (Don't ask me how I know. lol)

Last, we have the Modern Background Stencils Collection. I used one of the stencils on this Peonies on Parade watercolor sheet and masked off the flower. I actually painted the flower first, then masked it off and stenciled around it with the Modern Stencils and some Heidi Swapp mist. I trimmed off the sides and placed it onto white cardstock.

The savior sentiment is from the new Inspired: Savior stamps and dies.

Visit Nichole Heady's blog for all of the fun festivities happening each day, as there are challenges and prizes to be won during the anniversary festivities, and visit Papertreyink.com on February 15th at 10pm EST to grab all of these fun new products!