

I have a fun project that I couldn't wait to share with you today! The Papertrey Ink team members each created with the new Teach & Inspire stamp set and the Teacher's Apple dies, and I can't wait to see what amazing things they've come up with. I LOVED this set!! (I apologize in advance for a photo-heavy post!)


So colorful!

One more thing. I know this post is a little long!
...it's a little pencil made with a pack of Rolos candy. I used Summer Sunrise Patterned paper and Melon Berry cardstock to wrap around the Rolos and just taped it on the back.

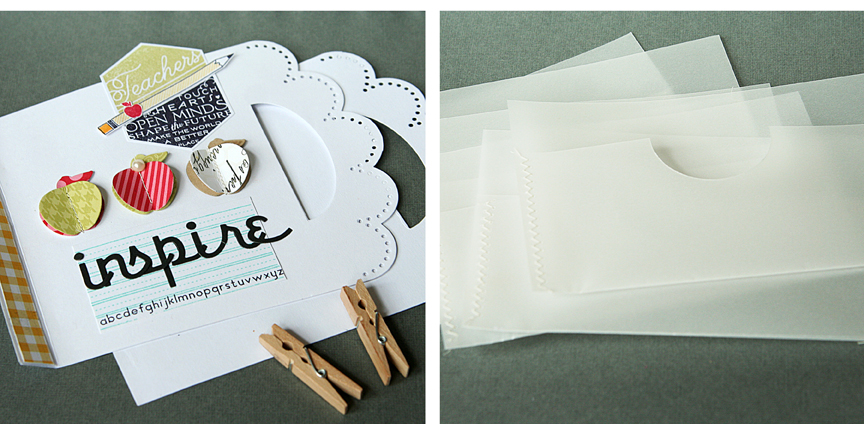
"Inspire" Book of Cards gift set for teacher:
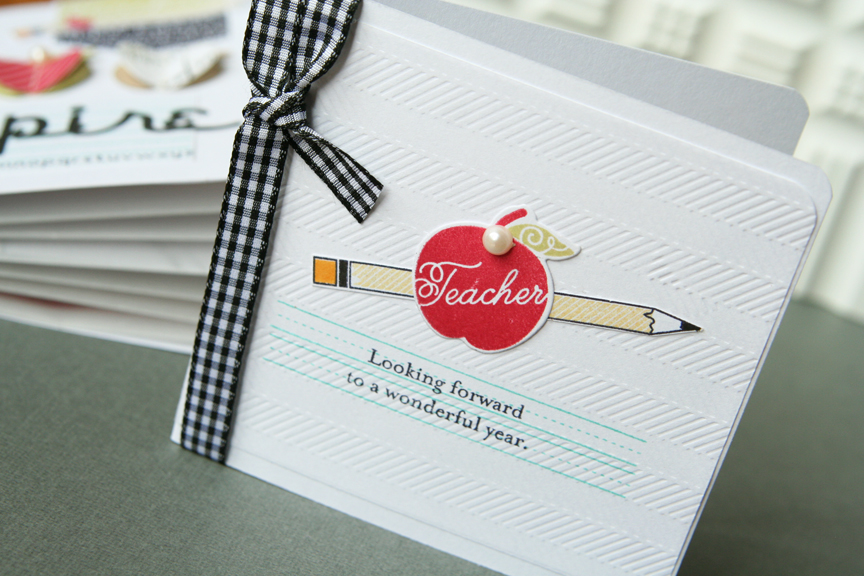
STAMPS: Teach & Inspire, Background Basics: Houndstooth, Think Big Favorites #19
INK: True Black, Spring Moss, Harvest Gold, Summer Sunrise, Pure Poppy, Hawaiian Shores, Classic Kraft
PAPER: White/Melon Berry/Spring Moss/Classic Kraft/Soft Stone cardstock, Pure Poppy and Summer Sunrise Pattern Pack, vellum. Other: Mistables by Pink Paislee, orange check by Lily Bee Designs
DIES: Front & Center #2 die, Script Alpha die, Teacher's Apple die, Background Basics: Herringbone Impression Plate, Block Alpha die
OTHER: True Black ribbon, felt, rustic twine, Pure Poppy button by Papertrey Ink. Pearls by Melissa Frances, font is Typewriter, clothespins from craft supply store, Rolo candy.
46 comments:
WOW! I love all you made here!!!
Fabulous mini album, Danielle! I love all the vellum pockets!
Wow! Awesome...I love them all :)
Wow, what a beautiful project!
Love your projects! I really like that you used the alpha block die letters and the negative piece too.
Love, love, love!!!! What an awesome gift!!!! You have inspired me beyond measure!!!
Um... wow. Total wow.
Oh. my. GOODNESS Danielle! LOVE this so much.
Totally beautiful, Danielle. Love it.
Another beautiful mini book ~ what a GREAT idea for a teacher gift!
You are amazing! Everything you create is exceptional.
OMG!! These projects are so great!! I love the way you packaged the card set. The cards are so sweet too!
Wher to begin!
1st you can't be too 'photo' heavy. They are perfection in instruction. And the results are devine! Such a thoughtful gift.
I am such a detail person, I focused in on the vellum pockets AND the Rollos pencil. The mini-book is a brilliant idea. I love the way you pulled it all together.
Oh my!! I love this idea!! It will go into my kids classes this fall! Thanks for sharing!!!
Your projects are so awesome! I have to get on the ball schools right around the corner for me!
What a wonderfully creative project!! Awesome!
-- Connie C.
This is out of this world wonderful and I for one LOVE it as well as all the photos you shared!!!!
So very cute! What a cute little book.
Golly girl! How do you come up with these terrific ideas. Love the apple button, the cards, the whole darn project. Gorgeous.
This is fabulous Danielle :) you are a very talented lady :) x
Adorable projects Dani!!!
ABSOLUTELY FABULOUS. WONDERFUL. AMAZING. BEAUTIFUL. YOU ARE AWESOME!!!
You absolutely inspire me. Thanks for sharing your creativity!
wspaniałe!:)
Wow! Your creativity knows no bounds. Thanks for sharing.
Awww, these are absolutely gorgeous, Danielle!!
love love love this! Never too many pictures! hugs
Goodness--never apologize for having too many pictures. Impossible. We will always be thanking you when there are lots of pictures. This is a wonderful project.
you are my IDOL! you are a CREATIVE INSPIRATIONAL GENIUS!! LOVE this little mini! :)
You are so creative! The mini album of cards is sooooo stinking cu..ute!
STUNNING..LOVE it so much gorgeous colors and design SUPER!!!!
Ahhhh just adorable
WOW!!!! Such detailing :)
I love looong posts with lots of photos because there is so much goodness and details to see! beautiful creations
This is amazing!
WOW!!!!!! Love EVERYTHING!!!! The pencil of rolos is precious to top off all the gorgeous cards and packaging!!!
I'm blown away. Absolutely, totally, and completely in awe. This is beyond fabulous, and the recipient is one lucky teacher!! The "card book" idea is such a brilliant idea & I'm so in love, I know I'll be trying it in the future! Thanks for sharing all those wonderful pictures - what eye candy! :)
just adorable, i was blown away to. this is so eye candy. thanks for sharing
sooooo cute bravo !
Your post is stink'in cute! Love your idea with the vellum pockets!
Hi Danielle...
Love this book too...as your work is always so gorgeous.
And so gorgeously photographed too. I can tell you use natural light. But other than that, would you be willing to share how you obtain such crisp shots. Do you shoot manually? Or in a program mode. Would love to know how you do such beautiful work. And if there is a class you would suggest that would be helpful too.
Thank you for your time.
~jamie pate
Danielle, your project is amazing and I would like to reproduce my version of it for my sister who is a special ed teacher. Could you tell me what size you made the actual cards? Are they all different sizes?
Hi there, yes they are all different sizes, but I tried to stick with an A2 size or smaller. You can make the envelopes first and then make sure the cards are made to fit into the envelopes, or you can make all of your cards and then just find your largest card and make the envelopes all that size to fit the largest card. I hope that helps!
Thanks for your note!
Danielle
Lovely! Clean, Neat, Not too busy.
Love it!
It's such a great idea and it is awesome, that you posted pictures of all the cards and how you made it. Mostly people on the internet just show a little piece of a book like this and I always wonder how they made it...
Post a Comment