Showing posts with label organization. Show all posts

Thursday, June 14, 2012

Desktop File: Inspiration.

The Papertrey Ink team is back again to show you another sneak peek called Desktop File: Inspiration. These stamps and dies are meant to go with any sort of Roladex system. I bought an inexpensive one from Staples for my project. This system that Papertrey Ink designed is meant for you to gather your ideas for color combos, sketches, techniques, mini albums, layout ideas, products, etc. related to scrapbooking and card making. There are many possibilities with this!

First, I'll tell you about how I decorated it a little bit, then I will show you the inside!
On the front cover, I cut the die with Soft Stone cardstock and stamped the "design notes" lines. Then I added a Pink Paislee houndstooth tape on the left. "MY" is die cut with the Script Alphabet dies, and I stamped "inspiration" over the little My Mind's Eye tag.
I cut a few more colorful tabs from patterned paper, just to make it fun, and to divide up the sections. The brads are by My Mind's Eye. Red paper is new by Papertrey Ink called Pure Poppy Pattern Pack.

For the inside, so far I have 4 sections started:
1. Color Combos,
2. Sketches,
3. Techniques, and
4. Products.

There are more options in the stamp set, however, that you can save inspiration for: mini books, quotes, embellishments and packaging ideas. I didn't get those added to my file yet.

1. COLOR COMBOS: Here are a few samples of the Color Combos cards. I had fun on Pinterest looking for color combo ideas! I could do an entire Roladex just on color combos!
2. SKETCHES: Here are some of the sketches I have so far. There are vertical, horizontal, square and circle stamps in the set, so you can save ideas for 12x12" layouts also, circle shaped cards or layouts, 8 1/2 x 11" layouts, etc.

Notice the cute arrows and "original source" stamp, so you can remember where you found the idea.
3. TECHNIQUES: Here is a sample of the technique cards I made.

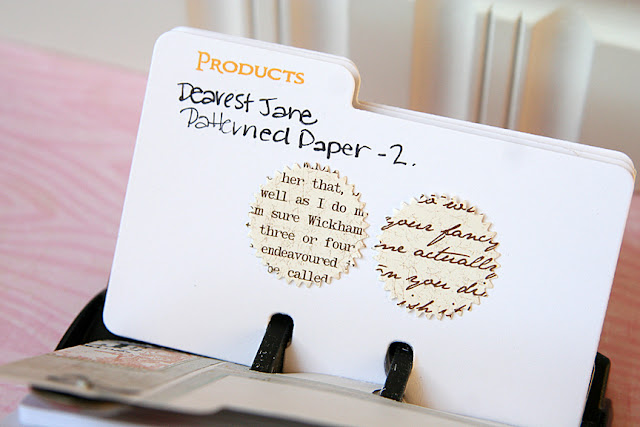
4. PRODUCTS: I really wanted to organize my Papertrey Ink patterned paper packs, so instead of rummaging through the packs to find a pattern when I need one, now I can easily flip through the Roladex. I punched a little circle from each paper in the packs. (Dearest Jane paper pack has 2 patterns.) Now I can see all of my papers at a glance.


I think it would be an amazing system for organizing ink colors and mist colors too. I might use the little rectangle stamp to put all my ink colors on one page, just to have it for a reference when I am trying to decide on a particular color and want to see them all side-by-side.

So, what do you think? Is this something you'd like to do to get your scrapbooking and card making ideas organized? Visit the rest of the team to see how they used the Desktop File: Inspiration stamps and dies.


Desktop File project:
STAMPS: Desktop File: Inspiration
INK: True Black, Hawaiian Shores, Pure Poppy, Summer Sunrise
PAPER: Rustic White, Soft Stone cardstock, Aqua Mist Pattern Pack, (gray) My Mind's Eye
DIES: Desktop File Center, Desktop File Left, Script Alphabet Dies
OTHER: seam binding, My Mind's Eye brads and tag, Pink Paislee tape, Smash tape (black).

Friday, February 3, 2012

In between projects, I get the itch to get more organized. I tend to be a VERY messy scrapbooker. Usually before a project is finished, my entire desk is covered - I mean covered - with stuff, and I have about a 5x5" square of space in which to work. It takes me awhile to get things back in order! I tend to be visual, so if there are things out on my desk I can see, they will be more likely to get used.
I don't have a big, fancy scrapbook room. While I love our house, we only have 3 small bedrooms. So, I decided awhile back to set up camp down in the basement. About a year ago, I posted about my scrap space. It still looks pretty much the same, with a few slight adjustments!
I've added a thread rack to hold the colorful threads...the little cup holds my needles.
Recently, I needed to figure out a new die organization system for my Papertrey Ink dies. I wasn't quite sure how to get them organized. I tried them in a binder with CD sleeves, but that didn't really work for me because when I flipped the pages of the binder, the dies would fall out. I decided to take the CD sleeves out of the binder and put them in a container.

Now I can flip through them easily. For now, I'm just using sticky notes to divide them into sections. I divided them into these categories so far:

People (like the Simply Jane dies)
Tabs, Notebooks, Envelopes
Frames, Tags, Shapes (circles, Ad Sense shapes, etc)
Animals
Baby, Kid (Little Princess die, Truckin' It, etc)
Spring, Flowers, Trees
Jars, Food, Fruit
Fall, Halloween
Letters, Numbers, Words
Christmas, Winter
Impression Plates

What I love about this system is that I can add more or change my categories when I need to. Love flipping through to see all of my dies! I still need to label the actual CD sleeves with the die set names. The larger dies like the borders, Favor It boxes, etc. are in a large plastic baggie in my Papertrey Ink box next to my desk.

I have all my punches and stamping inks on the pull-out keyboard drawer of my desk, easily accessible...

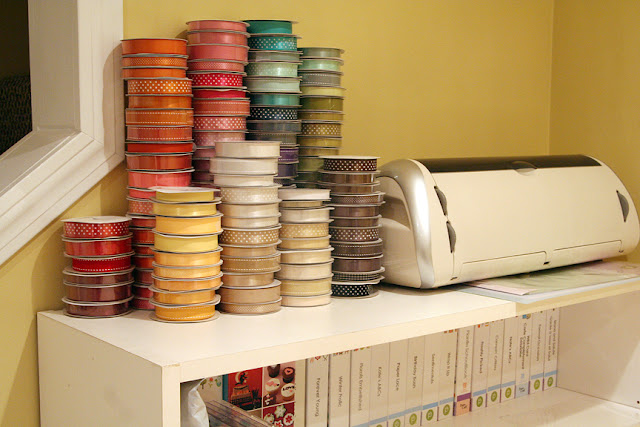
My Papertrey Ink stamps are on the bookshelf organized by title alphabetically in CD cases, along with my Cricut cartridges.
Trust me, it's not always this clean! Oh, I organized my blog recently also and added some links to the top to clean it up a bit. What do you think?

Thanks for stopping by today. This week will be an exciting one -- Papertrey Ink celebrates its 5th ANNIVERSARY! So stay tuned to lots of projects, blog posts, giveaways and such.

Sunday, August 15, 2010

a little about my scrap space...

I recently set up a desk in our basement, because I didn't have a place to call my own. I was scrapping in our dining room for a long time and decided it would be nice to have my sewing machine out and ready whenever I need to use it. (And then we could actually EAT at our dining table again too, a bonus!)
The desk is set up right where you come down the stairs and I share the room with my girls' big toys -- like their kitchen, lego table, art easel, etc. They love to hang out with me while I'm down there working. The easel and lego table are behind my chair. I'm lucky enough to have a storage room right next to where my scrap space is, so I have larger things like all my mini books and such stored in there, out of sight. The 2 large bins you see next to my desk on the right hold all my Jenni Bowlin and Pink Paislee products. (Except I keep the most recent Pink Paislee lines in the box under my desk, so I can quick grab what I need!) I have bins for Melissa Frances and Tattered Angels too, those are located in the storage room.

I found these large white cubes at AC Moore. They were about $40 a piece, so I saved my 40% off and 50% off coupons and bought them one at a time. I love seeing all the pretty colors of cardstock! The bottom tray holds layouts ready to be filed away. The drawers hold my flowers, buttons, ribbons, brads/bling, stamps, and other embellies. I bought some 12x12" Cropper Hoppers to hold the patterned papers (organized by manufacturer.) Rub ons, stickers and transparencies each have their own Cropper Hopper too.

On my desk, I have a basket for glues and hole punches, a cup for pens/scissors, and a container for my embossing supplies. I also leave my sewing machine up on my desk. The keyboard drawer pulls out and that's where I store all my punches for easy access. My hot glue gun and embossing gun are there too, along with a bag of photos to be scrapped.

Since I had SO many ribbons, I made my own ribbon wraps with cardboard. You can fit so many more ribbons in a drawer this way. (I have 2 drawers of them!) See the 12x12" clear file folders next to the ribbon? Those are holding my paper scraps by color. I don't keep a scrap, unless it is 6x6" or so.

These are the girls' toys...
Still a work in progress, and NO it's not always this clean, trust me!! But now that I have it organized, I think it will be a lot easier to keep it clean. :) Do you have pictures of where you scrap? I'd love to see them.
Danielle