Showing posts with label gold. Show all posts

Tuesday, February 2, 2016

Creative Cardmaker: Liquid Gold Gilding...

Happy Tuesday! Today over at Scrapbook Expo's Weekly Scrapper blog, I have a step-by-step tutorial for you on using Liquid Gold Gilding paint on cards with a quick and easy design. These cards literally took me only a few minutes and don't use many supplies at all...one sentiment stamp, paint, paintbrush, an old pencil and a black ink pad. Stop over to read more!

We have a snow day today, so I'm getting started on my Papertrey Ink goodies for this month that will be released on February 15th! Check out these pics of Kati with our neighbors! :) The girls are thrilled to get a day off today! We've gotten over a foot of snow, and it's still coming down. Enjoy your day!

Monday, November 30, 2015

Make It Monday: Splattering...

I am up this morning with a Make It Monday video! Today I'll be sharing a couple of ways to get the "splattered" look on your tags and cards.
There are a couple different ways to splatter...well, I'm sure there are MANY different ways, but in the video, I'll show you two techniques, a fine splattered look and how to get the big droplets, as well as how to make these pretty tags!
Swing by Nichole Heady's blog to see the new Make It Monday video tutorial! Have a very happy Monday!

Thursday, November 19, 2015

Creative Cardmaker: Inlaid Die Cuts...

Happy Thursday! This week I was up with another Creative Cardmaker post over at Scrapbook Expo's Weekly Scrapper blog. This time I have a tutorial on adding inlaid die cuts to your cards to get a really professional look!


This technique involves die cutting a word or shape out of the card front and inserting another of the same shape in a different color, like I did with the gold "birthday" here on this card.

The result is so lovely! I've used Papertrey Ink's Birthday Cheer dies, Confetti Toss stamps, The Sweet Life stamps and dies, gray paper from the new Stormy Sea + White Pattern Pack, True Black cardstock, and Luxe Gold Adhesive Sheets.

Stop by the Weekly Scrapper to read more about this process! Have a great day!
Danielle

Tuesday, November 3, 2015

Creative Cardmaker: Gold, vellum and layers...

Happy November! I can't believe it's November already...oh my! I have another quick card tutorial up for you at the Scrapbook Expo blog. Swing by to see how to make this card!


I've used Gossamer Blue's gorgeous Gramercy Road line. I couldn't help but to pull it out for fall again...it's perfect in every way!! Don't you just love that gold embossed floral paper?! The sentiment is stamped with Papertrey Ink's Basket of Blessings stamp set in Dark Chocolate and Classic Kraft inks. I'll see you soon. Be sure to check out my SHOP tab at the top of my blog, I'll be adding new things here and there! Happy fall!
Danielle

Monday, June 22, 2015

Make It Monday video tutorial: Bringing the Inside Out...

Good morning. I hope you are all having a bright, sunny start to your day and are ready to break out your stamps and dies for the next Make It Monday challenge! I've got a new video up for you on "Bringing the Inside Out", which you can see HERE at Nichole's blog.
First, to decorate the outside of the card, I've used the new Make It Market Mini: Garden Guild stamp set.
Then to bring the inside of the card out to the front, a circle is die cut through the front of the card with the Limitless Layers 2.5" Circle die collection. The Scripted stamps and dies were used for the sentiment and a flower from Quilted: Summer added to the inside.
Using this technique of die cutting a peek-a-boo window and decorating the inside with a pop of color allows you to add some much needed color to an otherwise boring inside of the card! And you still get the enjoy the pop of color on the outside as well...two for one! I hope you'll play along in the challenge over at Nichole's blog for your chance to win a Papertrey Ink gift certificate. Thank you for swinging by today! Be sure to check out the video HERE.

You Brighten My Days card:
(All supplies by Papertrey Ink unless otherwise noted.)
STAMPS: Make It Market Mini: Garden Guild, Quilted: Summer, Scripted
INK: Pure Poppy, Harvest Gold, Aqua Mist, Simply Chartreuse, Ripe Avocado
PAPER: Fresh Snow Fine Linen Cardstock, Harvest Gold Pattern Pack
DIES: Scripted, Quilted: Summer
OTHER: Gold metallic thread - Coats & Clark, sequins - Pretty Pink Posh.

Monday, March 2, 2015

Gossamer Blue: March kits...

The March kits are really pretty with blush and black, yellow and teal, and lots of gold hints throughout the kits! First up is a card made with just the March main kit only. I really loved all of the papers, so I wanted to figure out a way to incorporate many of the patterns together.

Scalloped circles were punched with a Martha Stewart punch and then I added them to a Card Base-ics 2 die by Papertrey Ink. I tied seam binding through the slots in the background. I even used one of the patterned papers as my sentiment by just punching out certain words from the gold paper! So quick and simple to make.

Maybe it would make a nice Easter card? Or a spring birthday!

Next, this card is made with a mix of the main kit, Bits & Pieces kit and the Life Pages Themed Add-on. Just layered some of the journaling cards here with a gold foil card from the Bits & Pieces kit by Pinkfresh Studio.

Love these sequins in the Bits & Pieces kit too! Added a white die cut that I made myself with the Swoosh dies by Papertrey Ink.

I've got more ideas with these kits coming soon to the Gossamer Blue blog! :) Happy creating!

Friday, February 27, 2015

keeping organized and accountable...

Well, have you recovered from the February release yet? I've been so inspired by all of the new products this past month and projects by the team. And I'm ready to see what's next! Are you?
I've finally started writing in my new Moments Inked planner after three weeks. I think I feared it because I wasn't sure what I'd use it for. Laundry? Dishes? My life is pretty boring outside the occasional school play and dentist appointment, ya know? But I decided it would hold me accountable for exercising and meal planning (or just being more aware of what I eat, as I can keep track). So far, so good! Did over 9 miles the past 3 days on the treadmill and am eating healthier, and now I can be proud to write in those accomplishments! It's holding me accountable, which I love! If you want to read more about the planner, visit this link: Moments Inked Planner.
I've also been working on photographing my cards for the Craftsy class, so if you are taking the class be sure to check into the Class Project section to see them in closer detail. And please, please upload your cards as well! I want to see them! If you haven't purchased the class and still want to, you can still get 1/2 off by clicking here: Cards With Dimension: Lovely Layers, Textures and Embellishments.

This is one of the cards I made as an extra sample to share at the end of the "Machine Stitching chapter". There are 7 lessons with about 3 chapters in each lesson. I make one card in each chapter (= about 21 new cards you'll see me create on camera) and then at the end of each chapter, I share at least 3 MORE card ideas using those skills in that particular chapter (= over 75 cards shown in my class)!

On this card, I've used a Pink Paislee - Color Wash paper in the background, Beautiful Butterflies dies by Papertrey Ink and a sentiment from Feather Finery.

Winter has finally hit Colorado, and we've been getting snowfall after snowfall this month! I'm so ready for spring and colorful flowers, bright green grass and spending time outdoors again. How about you?

Sunday, February 15, 2015

Release Day: February...

Today is release day when all of the new products for the month will be available (10pm EST) at Papertrey Ink. I have a few more new sets to show you. What fun it's been with the 8th Anniversary festivities, hasn't it?

First up is the new Etched Easter Eggs, and I made some little gift tags for Easter with the stamps and dies.

The tags are cut with the new Enclosed: Basic Folded Tag, then I stamped the vines with Lovely Laurels. I tucked some Etched Easter Eggs dies into the stamped leaf sprigs.


Sequins are from the Lovely Laurels mini kit. Love these! Pink twine finishes off the tags. The eggs are actually backed with acetate cut with the Egg die, so they kind of shine and resemble stained glass, even though it's hard to see in the photos.


Easter Tag Set:
(All supplies by Papertrey Ink unless otherwise noted.)
STAMPS: Etched Easter Eggs, Lovely Laurels
INK: Aqua Mist, Spring Moss, New Leaf, True Black
PAPER: White
DIES: Etched Easter Eggs dies, Egg Die, Enclosed: Basic Folded Tag die
OTHER: Twine, sequins from Lovely Laurels mini kit.
______

Next up, an Easter card with Easter Alleluias!

Love the big fonts in Easter Alleluias! I used Lovely Laurels again in the background and just inked up half of it at a time, so I could stamp the leaf sprigs going "out" instead of in towards each other, then tucked a "He is risen" sentiment inside. Added some stamped flowers and sequins from Lovely Laurels. Then I wanted a paper to add to the top that had all the colors in it that I used on my card to tie them all together, so I decided to make my own with Background Basics: Super Stripes.

Alleluia! card:
(All supplies by Papertrey Ink unless otherwise noted.)
STAMPS: Easter Alleluias, Lovely Laurels, Background Basics: Super Stripes
INK: Aqua Mist, Tropical Teal, True Black, Raspberry Fizz, Summer Sunrise, Harvest Gold
PAPER: White
DIES: Lovely Laurels
OTHER: sequins - Lovely Laurels mini kit.
______

Here are Blue Skies stamps and dies.

The rays are cut with Cover Plate: Blue Skies Rays die and stamped with the stamp set with Summer Sunrise ink.  Then I die cut and stamped the cupcakes. A fun little birthday card!

Sunny With a Chance of Sprinkles card:
(All supplies by Papertrey Ink unless otherwise noted.)
STAMPS: Blue Skies
INK: Summer Sunrise, Raspberry Fizz, Aqua Mist, Tropical Teal, Pure Poppy
PAPER: Raspberry Fizz Pattern Pack, Harvest Gold and White cardstock
DIES: Blue Skies, Cover Plate: Blue Skies Rays
OTHER: pearl by Melissa Frances, corner rounder, Martha Stewart scalloped circle punch.
______

Here is Monthly Moments: Year Round Mini stamp set (February stamp). I also used the Birthday Classics: September set to add "happy" and "birthday".

The flowers are cut and stamped with Bitty Bouquets. Paper is from the new Luxe Silver Foil papers. I really like the purples and silver together!


 Happy February Birthday card:
(All supplies by Papertrey Ink unless otherwise noted.)
STAMPS: Monthly Moments: Year Round Mini, Bitty Bouquets, Birthday Classics: September
INK: Plum Pudding, New Leaf, Lavender Moon
PAPER: Lavender Moon cardstock, Luxe Silver Foil papers
DIES: Bitty Bouquets, 2" circle punch - Fiskars
OTHER: pearls by Melissa Frances.
______

This is Keep It Simple: Mother stamp set that I stamped and embossed onto Sheer Basics Vellum. 


These pretty papers are the new Luxe Gold Foil papers (A2size), all I did was add a few things in the center, a 2" punched circle from Sweet Blush cardstock, a vellum circle cut with Limitless Layers 2 1/2" Circle die, a Swoosh die cut from Luxe Gold Cardstock and a flower cut with Bitty Bouquets.

With Love on Mother's Day card:
(All supplies by Papertrey Ink unless otherwise noted.)
STAMPS: Keep It Simple: Mother, Bitty Bouquets
INK: Pure Poppy, Spring Moss
PAPER: Sweet Blush, Sheer Basics Vellum, Luxe Gold Cardstock, Luxe Gold Foil papers (background)
DIES: Bitty Bouquets, 2" circle punch, Limitless Layers 2 1/2" Circle, Swoosh
OTHER: pearl by Melissa Frances, white embossing powder.
______

Here is one more with Quilted: Spring stamps and dies. 
Isn't it pretty? A quilt lovers dream and a great set for getting to add lots of different colors. 


 Love Is the Tie Quilted card:
(All supplies by Papertrey Ink unless otherwise noted.)
STAMPS: Monthly Moments: Year Round Mini
INK: Lavender Moon, Scarlet Jewel, Pure Poppy, Spring Moss, Sweet Blush, True Black
PAPER: white
DIES: Quilted: Spring dies
OTHER: twine, clear sequins - Pretty Pink Posh.
______

Everything will be available on Feb. 15 at 10pm EST at Papertrey Ink. 
Want to see more ideas with the new products? Visit the PTI team:

Friday, January 2, 2015

Gossamer Blue: January kits...
I don't know about you, but I'm ready to put the holiday stuff away and am longing for spring again already! The January kits are available at Gossamer Blue and are so pretty! Have you signed up for their kits yet? Don't forget, you can cancel at any time with no cancellation fee, and I PROMISE you'll adore these kits like I do! Amazing...each and every month! Here are two cards made mainly with the main Jan. kit.
The only thing I used extra was an enamel dot from the Jan. Life Pages kit on this one below. I simply cut the big gold heart (which I used on my other blog post, coming soon!) and used just a portion of it at the top of this card, along with other die cuts from the main kit, and then a bit of seam binding from my stash.
The gorgeous die cuts are by Crate Paper in the main kit, from their Kiss Kiss line. I adore them! You could make ENDLESS cards with these, there are so many in one package! Just lay out little layers of die cuts and other products you like together and then add them to a card! If you saw my post on Instagram a couple of weeks ago, you'll see how I like to lay out all different little vignettes with my goodies, and go from there to build cards.
Main kit only here, love that typed vellum. Oh my goodness. I love anything with type on it, and any kind of vellum, so I was in heaven.
I did add a tiny bit of mica flakes from my stash for some sparkle without adding bulk.
The last card is a mix of the main January kit and the Life Pages kit. The background paper is by Dear Lizzy's Serendipity line!
Layer, layer, layer. Love how all of these items are tucked together. So much fun, they fit perfectly together. The red stripe is an edge I cut off of one of the main Jan. kit 12x12" papers.
I have more to show you soon with these kits soon. Thank you dear friends for stopping by, I am always grateful for each one of you! Danielle

Wednesday, October 1, 2014

more Monthly Moments: September...

Hello! I'm back with one more project made with the Monthly Moments: September stamps, dies and Journal Card Collection by Papertrey Ink. If you'd like to see all of the products separately, you can see them here. With the cooler nights and all of the back-to-school events lately, I was in a mood to create a fall-ish thankful mini album. I haven't added photos yet, but photos will be easy to insert, just punch holes at the top and add them in between the pages on the binder ring!

Along with the Monthly Moments products, I've also used the Autumn Adornments stamps on the front cover, stamped and embossed it with gold embossing powder onto a Monthly Moments Journal card. I cut a Phrase Play #7 die from watercolor paper and then just painted some color right over the top and used the Monthly Moments: September stamps in the cut out ("falling leaves, harvest, hay rides"). The thankful was cut from gold paper.

The second page is another Monthly Moments: September Journal Card. I stamped "fall" with the stamp set and embossed it in gold again, trimmed it out and added a leaf die cut from the Doodlie-Do dies.

The third page is a little pocket cut with the Journal Pocket 3 die using vellum and is stamped/embossed with gold again ("Autumn"). You could add photos, journaling, etc. in the pocket.

Aren't these journaling cards cute? I love all the sayings on them.
On the fourth page, I made my own little pocket made with two of the Journal Cards and used some of the stamps on the front, also added a tag made from vellum to tuck inside.

The leftover leaf cut out from the "thankful" piece on the front cover works well here.

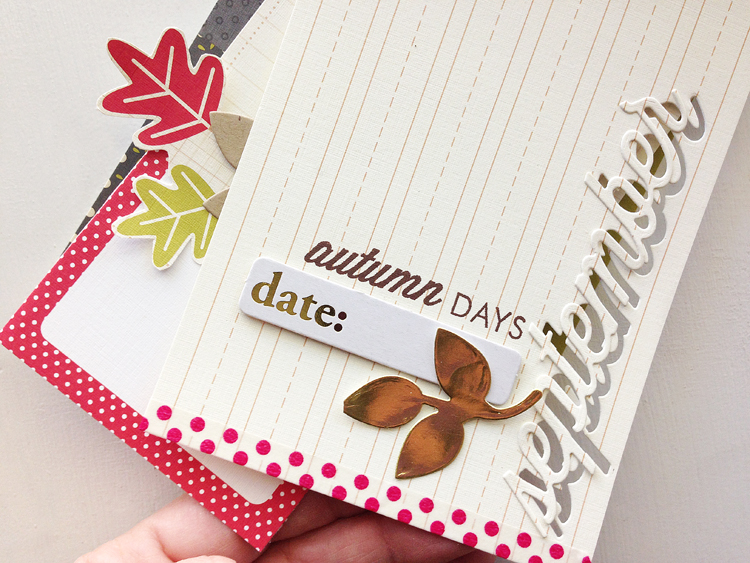
On this page, I used the Monthly Moments: September die to cut out the word, then glued the word back on over the top, offsetting it slightly. I like how you can see through the cut out word. "Autumn days" was stamped with Dark Chocolate ink.

Here I attached two journaling cards together to make one long page. This would be a good spot for journaling.

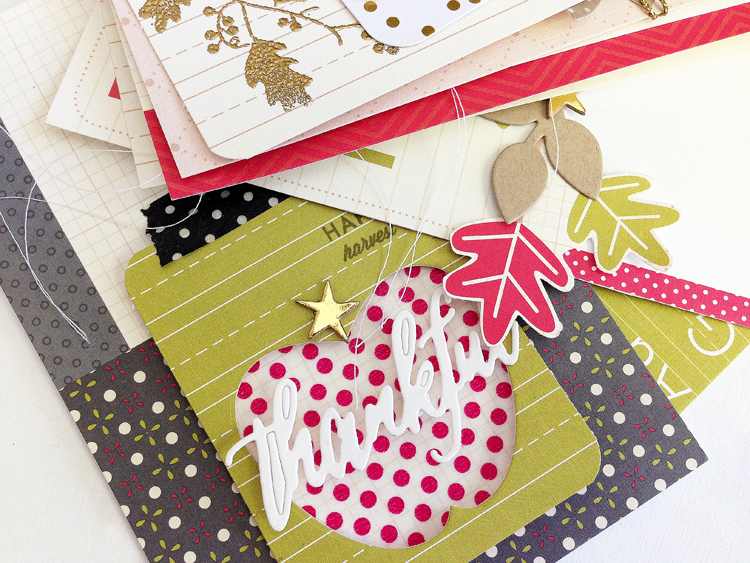
On the last page I'm going to show you, I cut an Apple Prints opening in the journal card and backed it with red dot washi tape and added another "thankful" die cut over the top cut with Phrase Play #7 die.
Would anyone like to give this little mini album a home? Please leave a comment if you are interested, and I'll choose a winner by the end of this week. So glad you stopped by!

Thankful Mini Album:
(All supplies by Papertrey Ink unless otherwise noted.)
STAMPS: Monthly Moments: September, Autumn Abundance
INK: Dark Chocolate, Pure Poppy, Classic Kraft, Versamark
PAPER: Monthly Moments: September Journal Card Collection, gold paper - Luxe Letterpress kit, white and Classic Kraft cardstock, Fine Linen Bitty Dot patterned paper
DIES: Journal Card 3 die, Doodlie-Do dies, Phrase Play #7, Apple Prints
OTHER: vellum, gold twine - Michaels, washi tape by MT, gold dot paper on front cover/gold stars- Heidi Swapp Project Life, watercolor paper, watercolors, corner rounder.
______

To see more September projects with the Monthly Moments collection, visit: