Showing posts with label heart. Show all posts

Tuesday, March 1, 2016

Cards With Dimension: Embellishments...

Happy Tuesday, and thank you for stopping in today! When I first began to create cards, I was more of a scrapbooker and hadn’t really dabbled in stamping all that much. This meant that I started to see my scrapbooking products in a whole new light…on cards! My style was very layered, and I loved to use embellishments! Embellishments were my absolute favorite thing. They added that touch of detail to my cards, a slight bit of dimension and extra interest that I didn’t feel a flat card could offer as well as an embellished card. My style is still very layered, and I love to use embellishments, but I like my cards to be clean looking as well, with a bit of white space.
Embellishments I love to use include, but aren’t limited to, chipboard elements, tags, rub-ons, sequins, ribbons, brads, rainstones, enamel dots, twine, etc.
For today’s card, I found a Heidi Swapp Washi Tape booklet in my stash that I hadn’t used yet, a Crate Paper tag and rub-ons, some Heidi Swapp chipboard pieces, enamel dots, and twine. I chose some of my favorite washi tapes from the booklet and attached them to a piece of white cardstock, then trimmed it down and rounded the corners. I added a “love you” rub-on to the tag. I stamped “Friend” on the card in Stormy Seas ink by Papertrey Ink from the Bitty Bouquets stamp set and “just thinking of you” with the Mat Stack 2 Collection stamps. I used a little hole punch to punch little notches for the twine. This way the twine will stay put while wrapped around the front piece.
When mixing embellishments, here are some tips: look for colors that complement each other (mix at least three for more interest!) and use different sizes of items – something small, something medium, and something larger in scale. Here the washi tapes add pattern and scale. The tag is the large item, the patterns are medium, and the enamel dots and text are small. It gives the eye so much detail to see! The black twine adds contrast to the lighter colors, which also keeps it interesting. Different shapes are good as well; see how the roundness of the enamel dots give the card softness from all of the hard edges?

Balancing the colors around the card in a triangle will also help you achieve success with embellishments. I have the aqua color spread around the card with the dots and washi tape. And I also have a triangle of black by using twine, tape, and sentiments in black.

If you are interested in learning more about my style of card making, I have an online class that I recently filmed here in Denver with Craftsy.com called Cards With Dimension: Lovely Layers, Textures and Embellishments. I have seven video chapters on adding dimension to cards, and working with embellishments is just one of the chapters, with three lessons in each chapter! Since March is National Craft Month, they are hosting a fun promotion for the next two weeks. Everyone who is new to purchasing a Craftsy class right now will be entered to win a $1,000 to donate to your favorite crafty charity. If you’ve been thinking of trying an online card class, now is a great time to give it a try! AND…as a special blog reader, I get to offer you 50% off! Click the link above!
If you'd like to try one of the other paper craft classes at a discount, you can view them HERE. Have a crafty, creative day!
Danielle

Tuesday, February 2, 2016

Creative Cardmaker: Liquid Gold Gilding...

Happy Tuesday! Today over at Scrapbook Expo's Weekly Scrapper blog, I have a step-by-step tutorial for you on using Liquid Gold Gilding paint on cards with a quick and easy design. These cards literally took me only a few minutes and don't use many supplies at all...one sentiment stamp, paint, paintbrush, an old pencil and a black ink pad. Stop over to read more!

We have a snow day today, so I'm getting started on my Papertrey Ink goodies for this month that will be released on February 15th! Check out these pics of Kati with our neighbors! :) The girls are thrilled to get a day off today! We've gotten over a foot of snow, and it's still coming down. Enjoy your day!

Thursday, January 15, 2015

Valentine pockets...


The January kits at Gossamer Blue were perfect for making "love-themed" projects, so I have some Valentine pockets I've made... great for holding a little treat, love notes, etc.
To make these pockets, I cut a piece of white cardstock 7.5" long x 4.25" high and folded it so that the fold in on the right of the pocket. I added type paper to the front and a piece of pom pom trim in between the layers on the right hand side before stitching. I trimmed the Kiss Kiss- Crate Paper gold heart die cut from January's main Gossamer Blue kit, so it would be off-set a bit on the pocket, wrapped seam binding around the card and tied in a bow on the right side, then finished off with a few more die cuts over the top. And of course some papers, die cuts and goodies tucked inside the pocket. (The Dear Lizzy - Watercolor Words are fun tucked inside! Love these, so much fun!!)
I love the colors this month, aren't they fabulous! Warm and classy.
On the second pocket, I did the same thing with the pom pom trim tucked in on the side before stitching it closed, then added a Watercolor Word and some die cuts and things over the top. A little collage.

Hope this inspires you to layer on your next project! When layering, be sure to choose large, medium and small patterns that coordinate. With the 3 different scales of patterns, it will be sure to be eye-pleasing!
Check out the Gossamer Blue blog also if you haven't stopped by in awhile! The team has more to share with you using the current month's kits, so stop by and check them out:

Friday, January 2, 2015

Gossamer Blue: January kits...

I don't know about you, but I'm ready to put the holiday stuff away and am longing for spring again already! The January kits are available at Gossamer Blue and are so pretty! Have you signed up for their kits yet? Don't forget, you can cancel at any time with no cancellation fee, and I PROMISE you'll adore these kits like I do! Amazing...each and every month! Here are two cards made mainly with the main Jan. kit.
The only thing I used extra was an enamel dot from the Jan. Life Pages kit on this one below. I simply cut the big gold heart (which I used on my other blog post, coming soon!) and used just a portion of it at the top of this card, along with other die cuts from the main kit, and then a bit of seam binding from my stash.
The gorgeous die cuts are by Crate Paper in the main kit, from their Kiss Kiss line. I adore them! You could make ENDLESS cards with these, there are so many in one package! Just lay out little layers of die cuts and other products you like together and then add them to a card! If you saw my post on Instagram a couple of weeks ago, you'll see how I like to lay out all different little vignettes with my goodies, and go from there to build cards.
Main kit only here, love that typed vellum. Oh my goodness. I love anything with type on it, and any kind of vellum, so I was in heaven.
I did add a tiny bit of mica flakes from my stash for some sparkle without adding bulk.
The last card is a mix of the main January kit and the Life Pages kit. The background paper is by Dear Lizzy's Serendipity line!
Layer, layer, layer. Love how all of these items are tucked together. So much fun, they fit perfectly together. The red stripe is an edge I cut off of one of the main Jan. kit 12x12" papers.
I have more to show you soon with these kits soon. Thank you dear friends for stopping by, I am always grateful for each one of you! Danielle

Thursday, December 18, 2014

Bits & pieces...

As a cardmaker, do you buy 6x6" patterned paper packs? I've been getting those more often lately and loving all of the smaller patterns and how well they work for cards. I have a couple of cards up on the Gossamer Blue blog...here is a little sneak peek.
I've done a bit of stamping and embossing onto vellum and punched out some hearts. With the negative of the punch, I used it as a mask and sprayed over the heart mask with Graphite mist by Tattered Angels. This is still one of my favorite mists, it's a little lighter than it looks here in the pictures, very soft and pretty. Anyhoo, stop by and visit the Gossamer Blue blog for all kinds of inspiration!

Are you all ready for the holidays? I'm not quite there yet, but getting company on Saturday, so I better be after tomorrow! Have a very happy holiday, crafty friends!
Danielle

Monday, December 15, 2014

Release Day: December...

The Papertrey Ink team is back to show you some more new stamps and dies being released this month! They'll all be released tonight at 10 pm EST. First up is the Drips & Dribbles stamp set. I used the coffee rings as O's for my XO cards!
I stamped the O's where I wanted them first with Raspberry Fizz ink, then I used a paintbrush with Raspberry Fizz reinker and some water and painted on matching X's. I also used Love You to Pieces: Additions stamps and Keep It Simple: Valentine stamps. You could stamp this XO pattern onto white wrapping paper and wrap gifts with it, how cute would that be. Maybe tape a candy onto the back of these XO cards for little school Valentines!
 XOXO Valentines card:
(All supplies by Papertrey Ink unless otherwise noted.)
STAMPS: Drips & Dribbles, Keep It Simple: Valentine
INK: Raspberry Fizz, True Black; Soft Granite - Hero Arts
PAPER: white
DIES: none
OTHER: twine.
______

Here is Phrase Play #11. I made a baby shower invitation with Keep It Simple: You're Invited stamped in the background.
After I die cut the Phrase Play #11 front piece, I painted it with Sweet Blush ink, Raspberry Fizz ink, and Pure Poppy ink.
 Hip Hip Hooray! card:
(All supplies by Papertrey Ink unless otherwise noted.)
STAMPS: Phrase Play #11, Keep It Simple: You're Invited
INK: Pure Poppy, Sweet Blush, Raspberry Fizz, Pure Poppy, True Black
PAPER: white
DIES: Phrase Play #11
OTHER: gold star - Studio Calico.
______

Next is Birthday Classics: January and the new Cover Plate: In the Woods.
The cover plate was cut in white, but left together instead of taken apart. I glued it down to my card base, so all of the pieces would stay on and added fine glitter to all of the little vines for a wintery effect! 
May Your Winter Be Warm card:
(All supplies by Papertrey Ink unless otherwise noted.)
STAMPS: Birthday Classics: December
INK: True Black
PAPER: white
DIES: Cover Plate: In The Woods
OTHER: chipboard polka dot star - Pink Paislee, gold star - Studio Calico, 
sequins - Pretty Pink Posh, fine glitter.
______

Aren't these little houses cute? This is the new Tinsel & Tags House Additions stamp set, made to coordinate with the Tinsel & Tags kits from Papertrey Ink. The die for this house was in the Tinsel & Tags Trimmings kit. Here I just used the stamps with Sweet Blush, Classic Kraft and Scarlet Jewel inks.
I added an American Crafts DIY Shop tag that I stamped "home" on and some fine glitter on top of the houses.
Home Is Where the Heart Is card:
(All supplies by Papertrey Ink unless otherwise noted.)
STAMPS: Tinsel & Tags House Additions
INK: Sweet Blush, Classic Kraft, Scarlet Jewel
PAPER: White
DIES: none
OTHER: American Crafts DIY Shop tag, embossing powder, fine glitter.

______

This card is made with Love Notes. Can't wait to give this to my mom and dad for their 44th anniversary in a few days! They are definitely an inspiration to my brother and I.
On this card, I used the same watercolor pencil technique you saw in my video a couple of days ago. This time I used orange, yellow and green pencils, and I put more water on my flowers to allow them to spread out a bit. You'll want to let them dry before you think you need to add more water, because they do spread out as they dry and will look different in about 15 minutes! Don't add too much right away. I added polkadots with my yellow pencil, then colored in the center of the card with yellow, let it dry, and after it was dry, stamped the sentiment with Love Notes.
Your Love Is An Inspiration card:
(All supplies by Papertrey Ink unless otherwise noted.)
STAMPS: Love Notes
INK: True Black; Soft Granite by Hero Arts
PAPER: Watercolor paper, Summer Sunrise cardstock
DIES: none
OTHER: watercolor pencils in orange, yellow and green.
______

The next two cards were made with Block Party. Some backgrounds and patterns were created with the blocks.
The colorful strip was popped up with pop dots for dimension.
Thanks for Building Me Up card:
(All supplies by Papertrey Ink unless otherwise noted.)
STAMPS: Block Party
INK: Pure Poppy, Raspberry Fizz, Summer Sunrise, New Leaf, Tropical Teal, 
Aqua Mist, Sweet Blush
PAPER: Aqua Mist and White cardstock
DIES: none
OTHER: none.
______

Another one made with Block Party, using the scallop block as a party banner.
Added a little hanging tag with a sentiment from the same set.
Happy Birthday to a Really Great Kid card:
(All supplies by Papertrey Ink unless otherwise noted.)
STAMPS: Block Party
INK: Harvest Gold, Aqua Mist, New Leaf, Raspberry Fizz, Orange Zest by PTI; 
Soft Granite by Hero Arts
PAPER: white cardstock
DIES: none
OTHER: twine, staple.
______

Next is a Valentine card made with Little Human. I die cut the pieces, stamped them and added them to one of Betsy's Love You to Pieces papers. 
This one cracks me up, because Kati used to say this when she was little, "My heart is BEEPING!" Oh, I miss those times when my kids were little and the cute things they used to say!
My Heart Beeps Only For You card:
(All supplies by Papertrey Ink unless otherwise noted.)
STAMPS: Little Human
INK: Pure Poppy, Enchanted Evening; Soft Granite by Hero Arts
PAPER: Love You to Pieces: Airplane, white cardstock
DIES: Little Human
OTHER: washi tape.
______

On this next card with the heart flowers, I used the new Hello There stamps along with Type Strips II (you). I punched 2" circles, then die cut the hearts out of the centers with Hello There dies.
A couple of the hearts were backed with patterned papers, and the largest one is stamped. The Hello There stamps were used to stamp "love" repeatedly onto the circles as well.
 Love You card:
(All supplies by Papertrey Ink unless otherwise noted.)
STAMPS: Hello There, Type Strips II
INK: True Black, Aqua Mist; Soft Granite by Hero Arts
PAPER: White cardstock, Tropical Teal Pattern Pack, Pure Poppy Pattern Pack
DIES: Hello There, 2" circle punch
OTHER: sequins by Pretty Pink Posh.
______


Last up is Give Me A Hand. I cut a slit in between the fingers and thumb to hold a heart.
The flowers were stamped with Love You to Pieces: Fox, the heart is cut from the Hello There dies, and the sentiment is stamped with Love Notes (love) and Big Hugs (sending).
Sending Love card:
(All supplies by Papertrey Ink unless otherwise noted.)
STAMPS: Give Me A Hand, Love You to Pieces: Fox (flowers), Big Hugs (sending), 
Love Notes (love)
INK: True Black, Raspberry Fizz, Aqua Mist, New Leaf, Sweet Blush
PAPER: White, Aqua Mist
DIES: Give Me a Hand, Hello There
OTHER: pearl - Melissa Frances, twine - The Twinery.
______

Phew, I think that's all of them! Everything will be available tonight at 10pm EST at Papertrey InkVisit the the PTI team to see more with these new products, and thanks for stopping by!

Friday, January 17, 2014

Tulle-Wrapped Kisses...

Valentine's Day will be here before you know it! I'm usually a procrastinator with most things, but I thought I'd get a head start on my Valentine's projects for today's Design Team Tips  at Papertrey Ink. I love "love". I love giving. LOVE this time of year! These would be great little gifts for neighbors, friends or your children's Valentine parties.

And the hard part about these? Not eating all of the caramel kisses before you are done creating! (The pink ones are chocolate with caramel in the middle...YUM!) Here's how to make them:

Step 1: Cut 2 pieces of tulle that are 12-14" long. (The tulle I found at the craft store came in a roll about 9" wide.) Lay them on the table so that they are perpendicular to each other (like a cross). Fill the center with Hershey Kisses. Grab all four ends of the tulle, bring to the center, and gather at the top. Tie a bow around it with seam binding or twine.

Step 2: Stamp several of the frames with the Four Square stamp set and cut them out. You can use a variety of colors. This way, if you are making 25 of these for your child's classmates, you won't get bored with just one color! Plus they look so cute when they are all together and so colorful. Stamp the centers of the frame with a sentiment from Heart Squared (or another "love" themed sentiment set.)

Step 3: Die cut a few arrows with the Cupid's Arrow die and kraft paper. Cut some little hearts out with the Cover Plate: Hearts die. One cut will give you a bunch of hearts! Stamp them with the Happy Hearts stamps. Wrap twine around the arrow, adhere a stamped heart and an enamel dot to each arrow, then adhere one arrow to each frame.

Step 4: Attach a frame to each tulle bag with a glue dot. (To get the crinkly look to the seam binding, just wet it slightly and squish it up. Or you can leave it smooth like the pink one shown below. You can also spray the seam binding with mists to change the color of the ribbon before you tie it on if you wish. Let dry before attaching.)

You are finished! Kick back and enjoy the "ooh's and aah's" you will get when these are handed out to friends and family!

Tulle Wrapped Kisses:
(All supplies by Papertrey Ink unless otherwise noted.)
STAMPS: Heart Squared, Four Square, Happy Hearts
INK: Hawaiian Shores, Raspberry Fizz, Summer Sunrise, True Black, 
and Harvest Gold by PTI, Soft Granite by Hero Arts
PAPER: white and Classic Kraft cardstock
DIES: Cover Plate: Hearts die, Cupid's Arrow die
OTHER: Hershey Kisses candy, tulle from craft supply, seam binding from Zipperstop, 
twine by Papertrey Ink, enamel dots by My Mind's Eye.
_________

Sunday, December 15, 2013

release day...

Papertrey Ink, my very favorite stamping company, has a ton of new products available this month tonight at 10pm EST. Here are a few more things I made with them. See the previous two posts for more! This card was made with It's a Banner Day and Cupid's Arrow stamp sets.

I stamped the floral background with a stamp from It's a Banner Day in Harvest Gold and added the arrow stamps over the top from Cupid's arrow, then a few stickers and paper at the top by Crate Paper. The black heart is stamped with Happy Hearts. The sentiment is from It's a Banner Day also.

When I'm With You card:
STAMPS: It's a Banner Day, Cupid's Arrow, Happy Hearts
INK: Harvest Gold and True Black by PTI, Soft Granite by Hero Arts
PAPER: Rustic White
DIES: none
OTHER: Paper and stickers by Crate Paper- Maggie Holmes line and Bunded Up, seam binding, chipboard stars by Studio Calico.
______

This is Heart Squared stamps and Wonderful Words: Love stamps and die. Also added the big hearts, which are cut with Cover Plate: Hearts die.

The center one is stamped with the Happy Hearts stamps.The heart square stamp was inked with Harvest Gold on the bottom, then Sweet Blush in the center and Raspberry Fizz at the top, then I stamped it onto the card...love the ombre effect. I cut white cardstock hearts and vellum hearts and layered them, then stitched them with my machine and folded the vellum up to stand up off the card. Gives it an airy feel.

With Love card:
STAMPS: Heart Squared, Wonderful Words: Love, Happy Hearts
INK: Raspberry Fizz, Sweet Blush, Harvest Gold
PAPER: white
DIES: Cover Plate: Hearts die, Wonderful Words: Love die
OTHER: enamel dot, patterned paper by Crate Paper.
______

This is Boutique Borders: Valentine stamps and dies. 
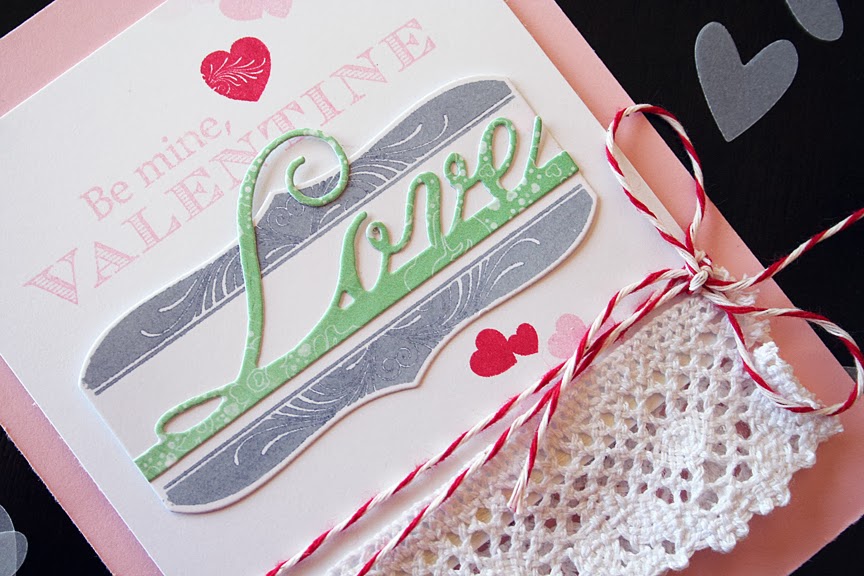
Added the One Liners die (love) over the Boutique Borders: Frame. The love is actually more of a teal color, not sure why it turned out so green in this photo!


Be My Valentine card:
STAMPS: Boutique Borders: Valentine
INK: Sweet Blush, Pure Poppy by PTI; Soft Granite by Hero Arts
PAPER: Sweet Blush, White
DIES: One Liners, Boutique Borders: Valentine
OTHER: lace, twine, Crate Paper patterned paper.
______

This cute owl and branch are from Polka Dot Parade #11. 
The owl is die cut and stamped, then I added him and the branch over a die cut with Boutique Borders: Valentine.

I Heart You card:
STAMPS: Polka Dot Parade #11 (owl), Heart Squared (sentiment)
INK: Dark Chocolate, Melon Berry, Pure Poppy
PAPER: White, Classic Kraft; Heart paper is Flea Market by Crate Paper
DIES: Boutique Borders: Valentine (frame), Polka Dot Parade #11 (owl)
OTHER: none.
______

This card features Propose a Toast stamps. I created a black, white and gray background with the Stitches and Swirls and Solid Stitches and Swirls. Love these!

I used the new Notched Heart Banner with vellum for the top piece of the banner and cardstock for the bottom piece of the banner.
May Your Hearts card:
STAMPS: Solid Stitches and Swirls, Stitches and Swirls, Propose a Toast
INK: Spring Moss, True Black, Soft Stone by PTI; gold by Tsukineko and Soft Granite by Hero Arts
PAPER: Rustic white, vellum
DIES: Notched Heart Banner
OTHER: seam binding, Maggie Holmes resin flowers by Crate Paper, Crate Paper sticker.
______

Hope you enjoyed some of these ideas.
Want to see more? Visit the other Papertrey Ink team members: